Showing posts with label project. Show all posts

Thursday, September 26, 2013

6 foot tall Book Case


Hello and welcome to my Woody Wood Works blog,

During this post I’d like to show you how I made a 6’ tall Pine Bookcase. Bookcases can be used to hold books, as well as pictures, decorative birdhouses, candles and anything else you would like to have on full display around the home.

Our children read quite a bit so our collection of books has grown over the years. We decided to build the following bookcase to accommodate a large amount of the books and series our kids continue to read,

Materials List

Pine board (Sides) 1 x 10 x 6’ - Quantity (2)
- Do not cut. These will be the sides
- makes 2 sides ¾ x 10 x 72”

Pine board (Front face bottom) 1 x 3 x 96 – Quantity (1)
- cut to 41”
- makes 2 bottoms ¾ x 2 ½ x 41

Pine board (Front face) 1 x 2 x 96 – Quantity (3)
- cut to 41”
- makes 6 front faces ¾ x 1.5 x 41

Pine board (Front and rear edge) 1 x 2 x 72 – Quantity (4)
- Do not cut. These will be the front and rear edges
- makes 4 ¾ x 1.5 x 72

Pine board (Shelves) 1 x 10 x 96 – Quantity (4)
- cut to 41”
- makes 8 shelves ¾ x 9.5 x 41

Wood Glue
Course Kreg screws 1.25"
Brad Nails 2" or finishing nails)

Tools
Kreg Jig
Chop Saw/Miter Saw
Drill
Clamps
Nail gun (or hammer)
Yard Stick/Tape Measurer
Pencil


Starting it off:

First I cut the lumber down to size.
My shelves are cut to 41", the sides are an even 72" (no cutting needed), as well as the sides. 

Next I made some pocket holes for all shelve front-faces

(this is what the shelves will get attached to)

For making these pocket holes I used a Kreg Jig.

Settings were set at 3/4"

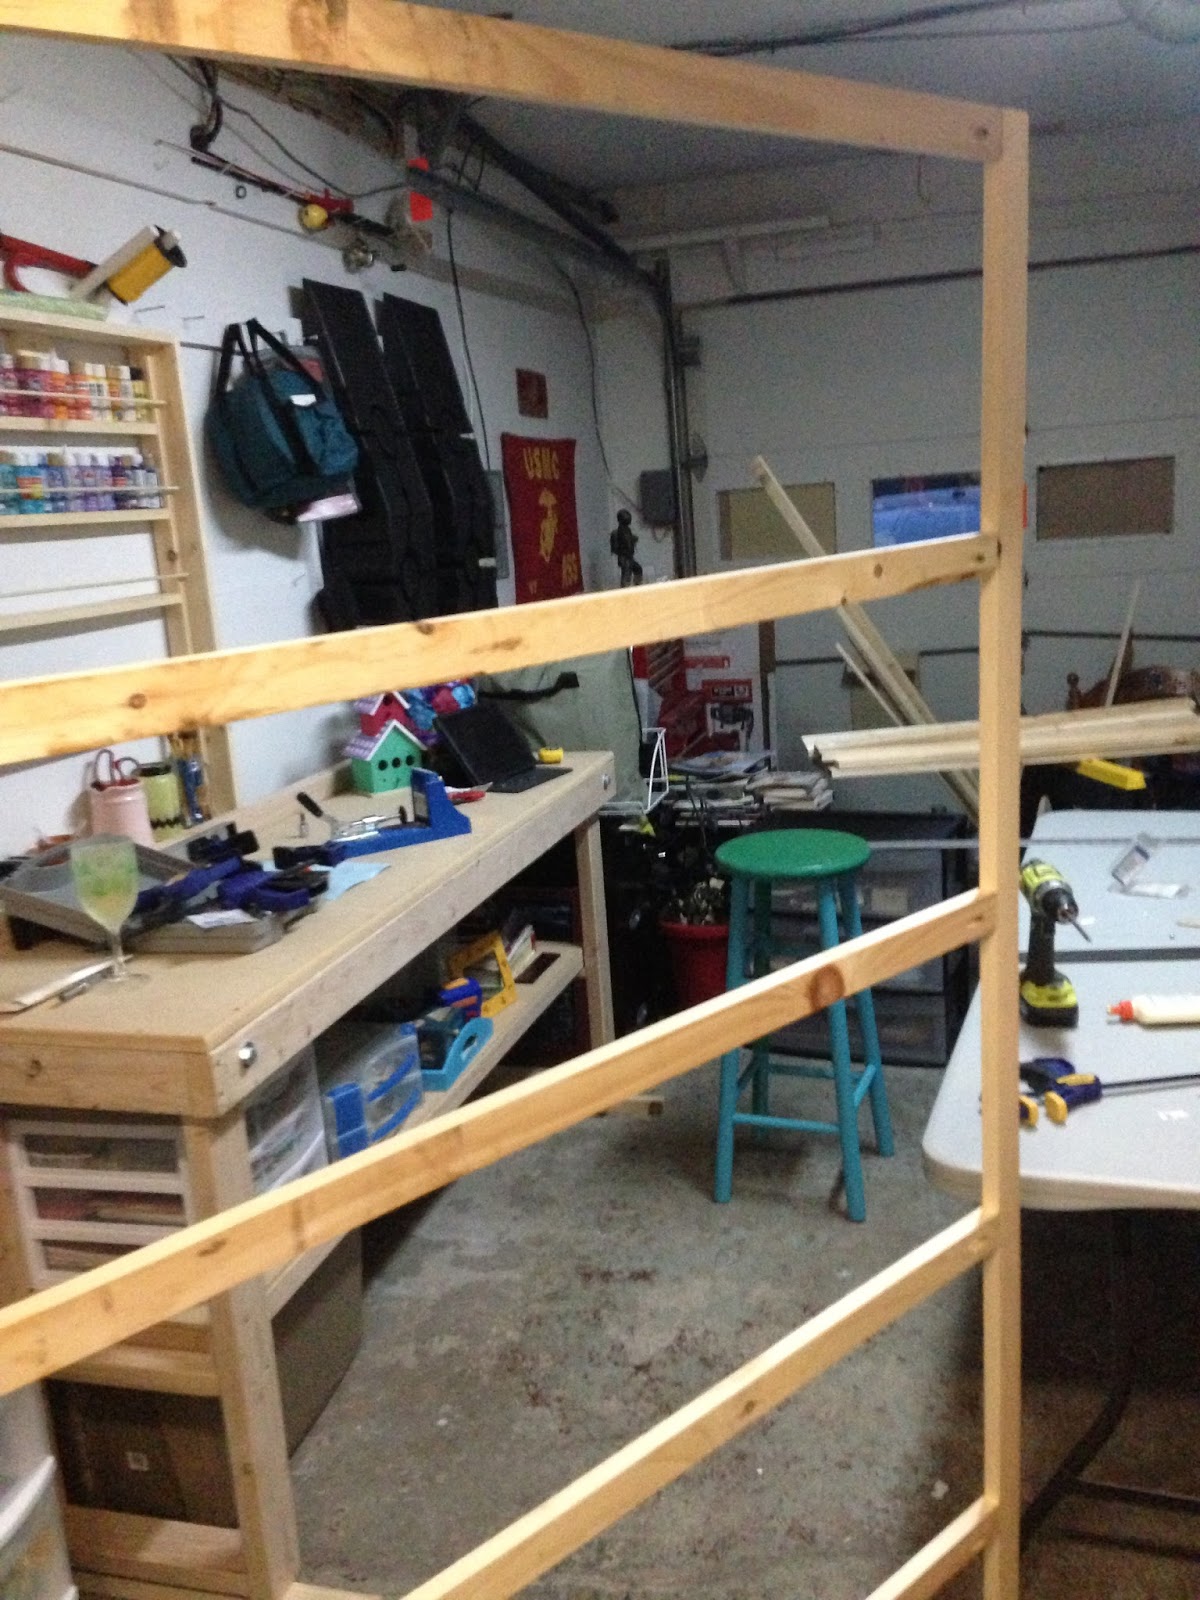
Once all pieces were cut to size and pocket holes were screwed together I mocked the front frame by laying the pieces where the would go.

Make sure you take the time to measure the distances between each shelf at this time. I made the first shelf (closest to you as you look at the picture above) larger than the others.

Typical sizes are about 10" for each shelf. 

Once the mock up is complete, I glued and screwed the boards together utilizing 1-1/4 Coarse Kreg Screws.

Ensure you mark the location, then clamp it down to ensure the boards do not shift once it's being drilled together, and thats all :-)

Place the side board perpendicular to the shelf-fronts so that you can mark the board.

This is where the next pocket holes will be screwed, attaching the boards to the front and rear frame (which will be made later).

Mark the board with a pencil, then repeat on the other board.

This is a picture of the board with the pocket holes already made. 

Glue the side to the frame, and screw them together.

Only glue and screw one side at this time.

Once ONE side is screwed on, drill pocket holes on each shelf edge.

Drill pocket holes on the back side of the board as well.

This is another picture showing where I drilled pocket holes on the back side of the shelves.

Glue and screw each shelf to the frame and to the side.

This is another shot of the side, the shelf, and front frame (facing the floor) together.

Make the back frame. You can now glue/screw the remaining 4 pieces (two 1 x 2 x 72 for the sides, one 1 x 3 x 41 for the bottom, and 1 x 2 x 41 for the top).
Now screw the second side to the bookcase.

The last step is gluing and screwing the rear frame.

We plan to cut another board for the very top of the bookshelf.  We will glue/screw this last piece flushed inside the bookshelf, and place some molding on the upper edge of the bookshelf.  

This covers how to make your very own bookshelf/storage unit. You can purchase some plywood, about 1/4" thick, and nail it to the back of the bookcase. As you may imagine, the backing will stick out 1/4 inch by using this method.

Thanks for taking the time to read through our tutorial. We look forward to providing many more to come.

Please feel free to comment, share, like as you deem appropriate.


Follow us on:

http://www.etsy.com/shop/WoodyWoodWorks

https://twitter.com/woodywoodworks

http://instagram.com/shabbyanddistressed


- Raquel

Tuesday, September 3, 2013

Paint Rack

Greetings everyone,

In this post I'd like to show you guys how to turn some empty wall space into a custom paint rack station. This design can very well be used to create storage or a play area for children.


Finding no plans of my own, I decided to create the top according to my own measurements. I chose not to create the drop/fold-down table part since I already had a workbench to craft our designs.


I wanted to create my Paint Rack with the dimensions of 36" x 36".

The top three shelves would be spaced 5.5" inches apart, while the 4th shelf would be 7.25" and the fifth (bottom) would be 9". The reason I picked these sizes is because I wanted to accommodate the different sizes in paint bottles, brushes and other materials that would be stored within.


Materials List
Pine board (Shelves and inner sides) 1x2x8 - 3 boards
- cut to 36"
- makes 6 pieces of 3/4 x 1.5 x 36

Pine board (Sides) 1 x 4 x 8 - 1 board
- cut to 38"
- makes 2 pieces 3/4 x 3.5 x 38

Pine board (Top and bottom) 1 x 4 x 8 - 1 board
- cut to 37.5"
- makes 2 pieces 3/4 x 3.5 x  37.5

Dowels 1/4" x 48 - 4 dowels
- cut to 37.5"
- makes 4 dowels


Wood Glue

Course Kreg screws 1.25"

Brad Nails 1.25"(or finishing nails)

Tools
Kreg Jig
Chop Saw/Miter Saw
Drill
Clamps
Spade bit
Nail gun (or hammer)
Yard Stick/Tape Measurer

And it Begins:
Cut the boards to length
Measure the distance between the shelves. Mock the layout to make sure you are happy with the dimensions.


Mark the locations where the shelves will be placed. 


I placed both inner side boards side by side and marked them at the same time. This allowed me to ensure I had the same distances (where the shelves would be) for both sides- making the shelves square.


Once the shelves are marked, Mock them to ensure the sizes correspond to your liking. 

Now, make pocket holes on the shelf boards using the Kreg Jig. Since the board is only 3/4" thick, I made (1) hole in each end.

Setting on both the Jig settings is set at 3/4". Instructions and other tips are available online at the Kreg Jig website.

A look at the shelves and their corresponding pocket holes. These holes are placed on the bottom part of the shelves.

I experimented with (2) holes on the first board but the risk of cracking the wood was not worth the reward. Since these boards will not be holding considerable weight, (1) hole/screw is plenty strong. Later on we will reinforce these joints with brad nails.

I placed one inner side board and clamped it to my workbench, then glued & screwed the shelves one side at a time.

*As I've learned through experience, it's good practice to use wood glue when joining boards together*  

This is a look of the inner frame. Don't mind the messy wall in the background ;-)

Now we will attach the inner frame side pieces unto the bottom piece (3/4 x 3.5 x 37.5).

The bottom piece will be the foundation and also become the bottom shelf. 

Ensure (as pictured above) you align the inner frame sides flushed. 

Before screwing the inner sides to the outer sides (3/4 x 3.5 x 38), measure and mark the dowel locations. I selected mine as 2" above the shelf, and .5" forward.

The dowel will hold the paint from falling out.

Mark both outer sides at the same time (mirror images) so that you can have the same length on both boards.


Dowel marks

Select a spade bit equal to the size of the dowels selected. I used 1/4" dowels, so I used the 1/4" spade bit.


Now, dig a small hole where you made your dowel markings. I went about 1/4" deep.

Even if you go deeper (as long as you don't go through the board) or shallow the dowels are somewhat flexible and you can maneuver them into place.

Dowel holes finished. 


Join the inner and outer sides by laying down some wood glue, then using the clamps to hold the boards together.

Finish up my nailing the boards together. 

Do the same for the top board, glue the edge, then screw the inner side board to top.

Follow it up by nailing the outer-side and the top ends together.


Now that your frame in complete, insert the dowels into their respective holes.

This is my completed pine Paint Rack. While you can keep it as is, I plan on sanding, staining and sealing it in the near future.  

There are many ways to mount the rack to the wall. The method I chose was as follows:
First I located the studs with a stud finder. Then I nailed four  3/4 x 2 x 1scrap blocks (small rectangles) to the studs.

Two were placed on beneath the top of the frame, and two others were placed beneath the bottom shelf.

You can actually see these blocks on the final picture below. 
Attached is the completed Paint Rack courtesy of Angel and Raquel
"Woody Wood Works"

Thanks for taking the time to read through our tutorial. We look forward to providing many more to come.

Please feel free to comment, share, like as you deem.


Follow us on:

http://www.etsy.com/shop/WoodyWoodWorks

https://twitter.com/woodywoodworks

http://instagram.com/shabbyanddistressed

http://pinterest.com/indigo79/


- Raquel


The original design for this rack was taken from a drop-down table I originally wanted to re-create.


Wednesday, January 25, 2012

8 Simple steps to your very own wooden Magic 8 ball trinket box

In just a few steps you can turn a simple wooden round box into an awesome "Magic 8 Ball" trinket box that’s perfect for anyone. Ready? Lets do it!

You’ll need:

-1 round wooden box

-1 round, flat wooden piece (optional, read Step 3)

-Sand paper

-Black acrylic paint

-Blue acrylic paint

-white paint

-1 sponge paint brush

-1 medium sized paint brush

-Black marker

-E6000 (strong glue in a silver tube)

-Mod Podge (glue)

-Computer

-Printer

-Paper

-News paper

The first thing you’ll always want to do is protect your surface by laying down a few sheets of newspaper, it takes just a second. Trust me you’ll regret it if you don’t. I cant tell you how many times Ive ruined something of mine with paint because I was in a rush to try something new. Ive learned my lesson though, and as excited as I may be to start a new project, I ALWAYS take the time to protect my surface.

Ok so here we go

Step 1. Sand the rough edges on your box and lid

Step 2. Paint the outside of the box and its lid in black (let this dry)

Step 3. While your box is drying you can paint one side of the round flat wooden piece in white. If you don’t want to use or cant find a round flat wooden piece then find something round in your home and trace it on the lid before you paint the lid in black. Paint the inside of the circle in white, and paint the outer part of the circle in black. When this part dries, you can then write the number 8 in the middle of it.


Step 4. Once the box and lid dries, paint the inside of each in blue (like the liquid inside a magic 8 ball) and let it dry completely

Step 5. Using your computer and printer, type a few of the Magic 8 ball phrases, print, and then cut the answers inside a triangular shape.

Ex; Ask again later, My reply is no, Yes, doubt it

Step 6. Using your Mod Podge go ahead and glue each triangle on the inside of the box. Have fun with it, they don’t all have to be facing the same direction, try to simulate the floating effect in the magic 8 ball. The tips of the triangles can face down, up, left, right, at an angle etc…

Step 7. Dap a dime size of your E6000 glue (or any glue that bonds to wood) to the back of the round, flat wooden piece that you painted white, and place firmly on the lid (in the middle)

Step 8. When the glue dries, go ahead and brush on a layer of Mod Podge on your box, inside and out and youre done!


Oh BTW incase you havent read my blog on how to make Frankenstein, Mod Podge goes on white but dries completely clear, sooo don’t freak out!


How easy was this to make, right? I told you it was an awesome little box. I love things like this because not only can this be a gift for someone all on its own, but you can also use it as part of your décor in your home, bedroom, office etc… hey if you’re more of a pool player you can leave out the triangles with the answers and call it an 8 ball trinket box instead! Its all up to you.

Hope you had fun. If you’ve read my steps and tried making this box please feel free to share your comments and post your pictures